Planning a wedding is magical — but let’s be honest, it can also get expensive fast. One of the sweetest ways to save money and add a deeply personal touch? Creating your own DIY wedding invitations.
Handmade invitations don’t just share details — they tell your love story before guests even arrive. Whether your vibe is romantic, modern, rustic, or minimalist, a thoughtfully crafted invitation sets the tone for the entire celebration.
Ready to design invitations that look Pinterest-perfect and totally professional? Let’s walk through it step by step.
Step 1: Choose Your Wedding Style First
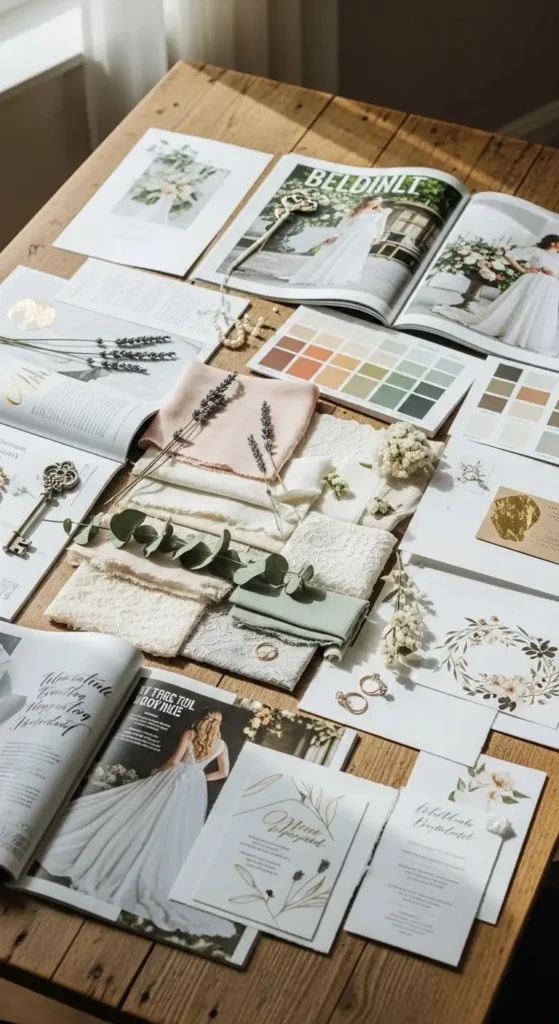
Before you touch cardstock or open Canva, decide on your overall wedding aesthetic. Your invitation should feel like a preview of the big day.
Ask yourself:
- Is your wedding rustic and outdoor?
- Classic and elegant?
- Boho and whimsical?
- Modern and minimal?
Once you choose a style, stick to it consistently — fonts, colors, embellishments, and paper type should all align.
Pro Tip: Create a small mood board (physical or digital) to guide your design decisions. This prevents random choices that don’t match your theme.
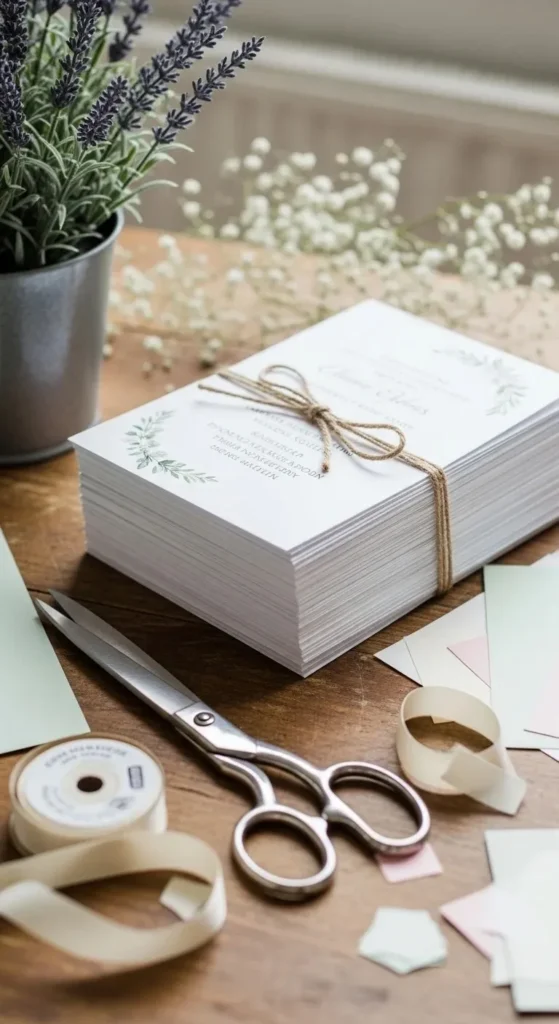
Step 2: Pick the Right Paper and Materials
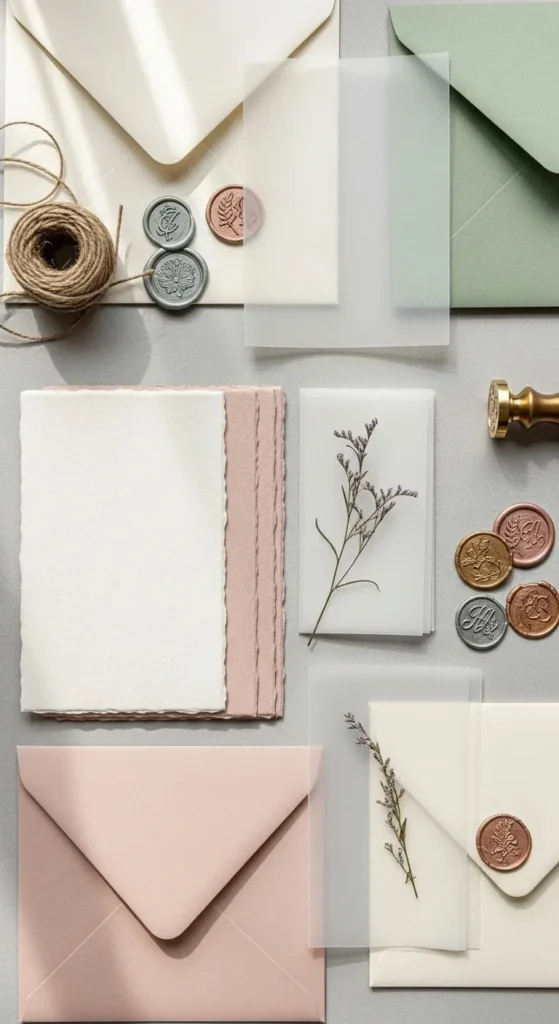
Paper makes a huge difference. Cheap paper can instantly make your invitations feel less special — but the good news is, you don’t need luxury pricing to get luxury vibes.
Popular options include:
- Textured cardstock – Elegant and sturdy
- Vellum overlays – Soft, romantic, semi-transparent
- Deckled-edge paper – Handmade, organic look
- Recycled kraft paper – Perfect for rustic weddings
You’ll also want to gather:
- Matching envelopes
- Ribbon or twine
- Wax seals (optional but stunning!)
- Dried florals or pressed leaves
- High-quality ink or foil accents
Invest where it matters most: the base paper and printing quality.
Step 3: Design Like a Pro (Even If You’re Not One)
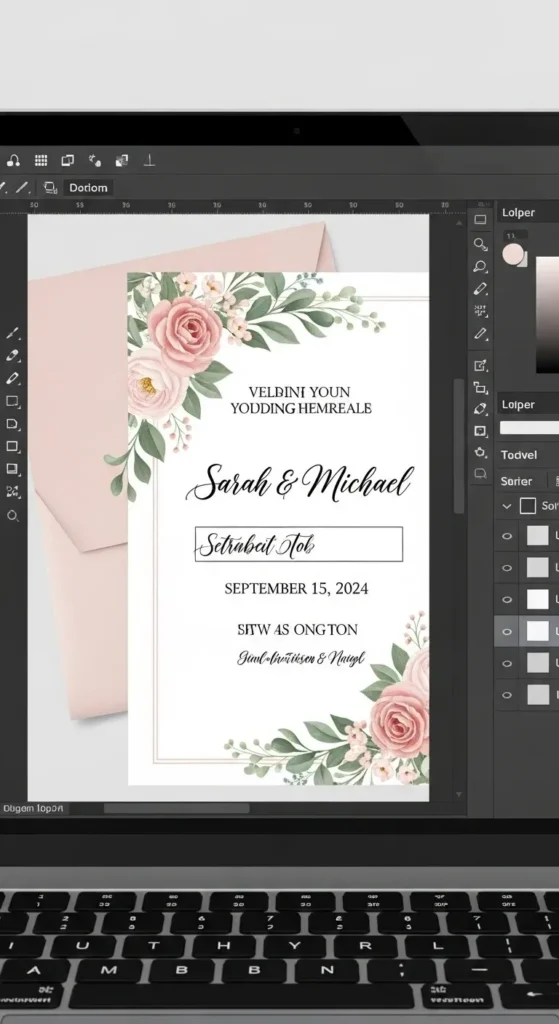
You don’t need graphic design experience to create gorgeous invitations.
User-friendly platforms like:
- Canva
- Adobe Express
- Templett (for editable templates)
make it easy to customize fonts, spacing, and layouts.
Keep these design tips in mind:
- Limit yourself to 2–3 fonts maximum
- Use white space generously
- Align text carefully (centered or left-aligned, not random)
- Keep wording clear and traditional (unless your vibe is modern and playful)
A simple formula:
Top: Couple’s names
Middle: Wedding details
Bottom: Date, time, location
Less clutter = more elegance.
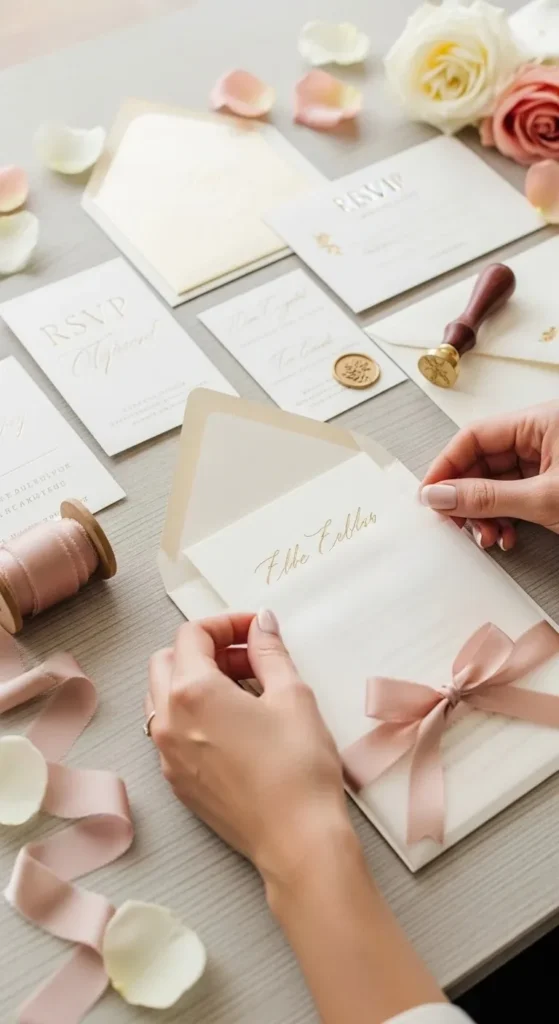
Step 4: Add Personal Details That Wow
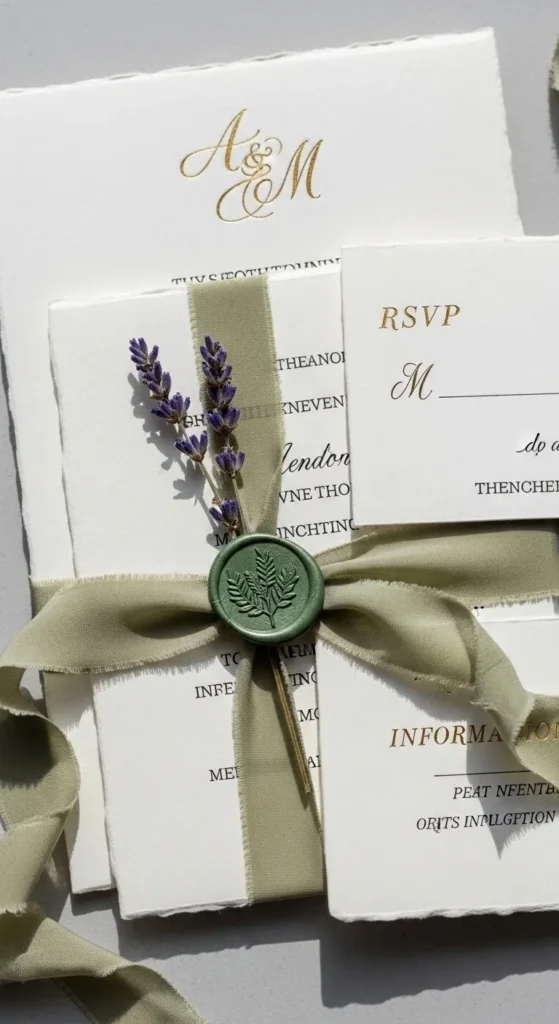
This is where DIY really shines. Small details make guests pause and say, “Wow.”
Consider adding:
- A custom monogram
- A meaningful quote
- A map of your venue
- Handwritten envelope calligraphy
- A wax seal in your wedding color
Even something as simple as a soft silk ribbon can transform a basic card into something breathtaking.
If you’re crafty, try:
- Pressed flowers from your garden
- Hand-stamped designs
- Watercolor washes
These little touches create a luxury feel without luxury prices.
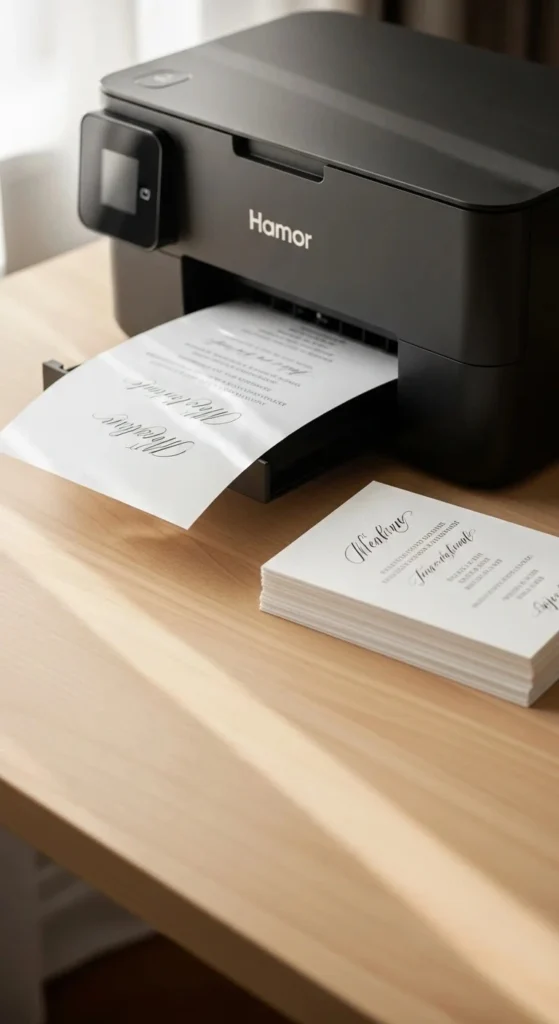
Step 5: Print Smart (At Home or Professionally)
You have two main options:
Printing at Home
Best if:
- You’re making a small batch
- You want total control
- You’re comfortable adjusting print settings
Use:
- A high-quality inkjet printer
- Thick paper-compatible settings
- Test prints first
Professional Printing
Best if:
- You want foil, letterpress, or embossing
- You’re printing 100+ invites
- You want flawless results
Local print shops are often more affordable than you think — and you can still supply your own design.
Step 6: Assemble With Care
Assembly takes time — so don’t leave it for the last minute.
Plan a cozy “invitation night”:
- Play music
- Light candles
- Invite your bridal party to help
- Make it fun
Checklist before sealing envelopes:
- Double-check spelling
- Confirm venue address
- Include RSVP details
- Add postage correctly (especially if bulky)
Nothing ruins the magic like returned mail due to missing stamps!
Budget-Friendly DIY Tips
Want to keep costs low without sacrificing beauty?
- Print two invitations per sheet to reduce paper waste
- Skip extra inserts if unnecessary
- Use digital RSVP options
- Buy supplies in bulk
- Watch for craft store sales
Remember — elegance comes from thoughtful design, not price tags.
Final Touch: Presentation Matters
Before sending them out, lay everything flat and look at the full suite together:
- Invitation
- Details card
- RSVP card
- Envelope
Does it feel cohesive? Balanced? “You”?
If yes — you’ve nailed it.
Your Invitations, Your Story
DIY wedding invitations are more than paper and ink — they’re the first chapter of your wedding story. When guests open that envelope, they should instantly feel your style, your love, and your excitement.
The best part? Every ribbon tied, every seal pressed, every detail chosen is filled with intention.
So gather your supplies, embrace the creative process, and design something that truly represents you both.
And don’t forget — save this guide for later while you’re planning your big day! 💍✨