Let’s be honest—most “budget” garden makeovers you see online still cost hundreds (or even thousands) of dollars. Fancy patio sets, expensive planters, and professional landscaping can quickly turn a simple project into something unrealistic.
But what if you could completely transform your yard for under $100?
No shortcuts. No gimmicks. Just smart choices, creativity, and a bit of effort.
In this guide, I’ll walk you through a real, practical garden makeover that proves you don’t need a big budget to create a beautiful outdoor space. Whether you have a tiny backyard, a neglected corner, or just a dull outdoor area, this step-by-step breakdown will show you exactly how to upgrade it without overspending.
The Starting Point: A Yard That Needed Help
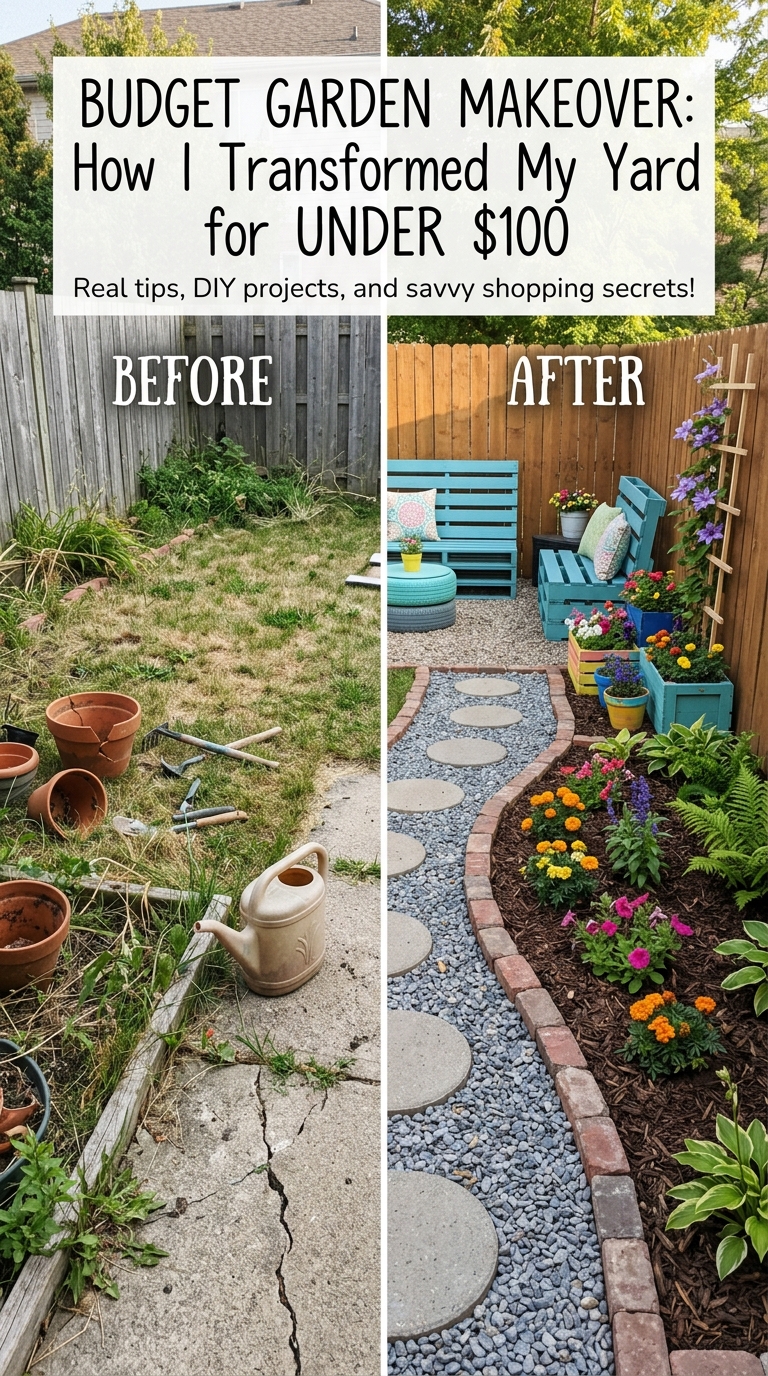
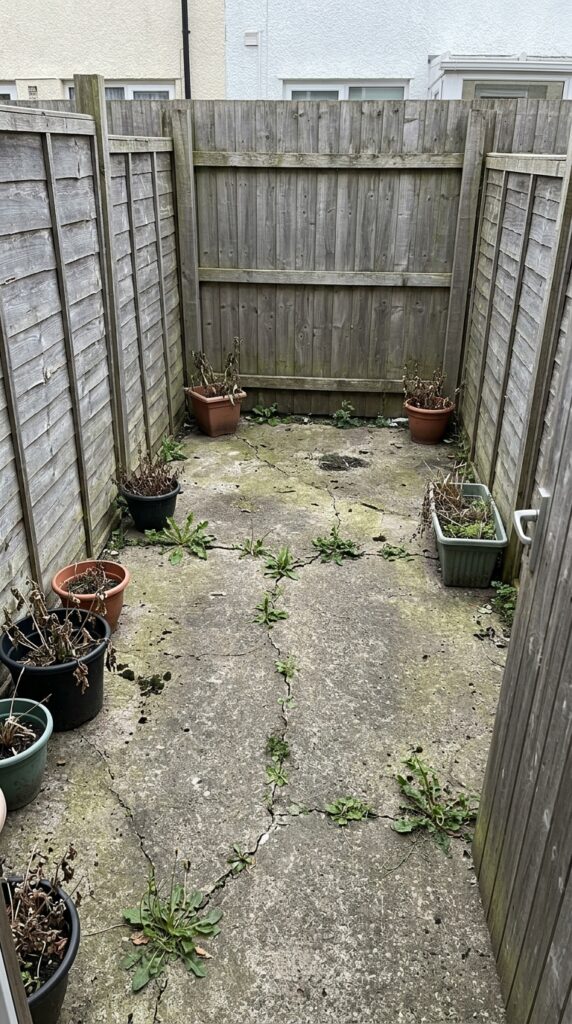
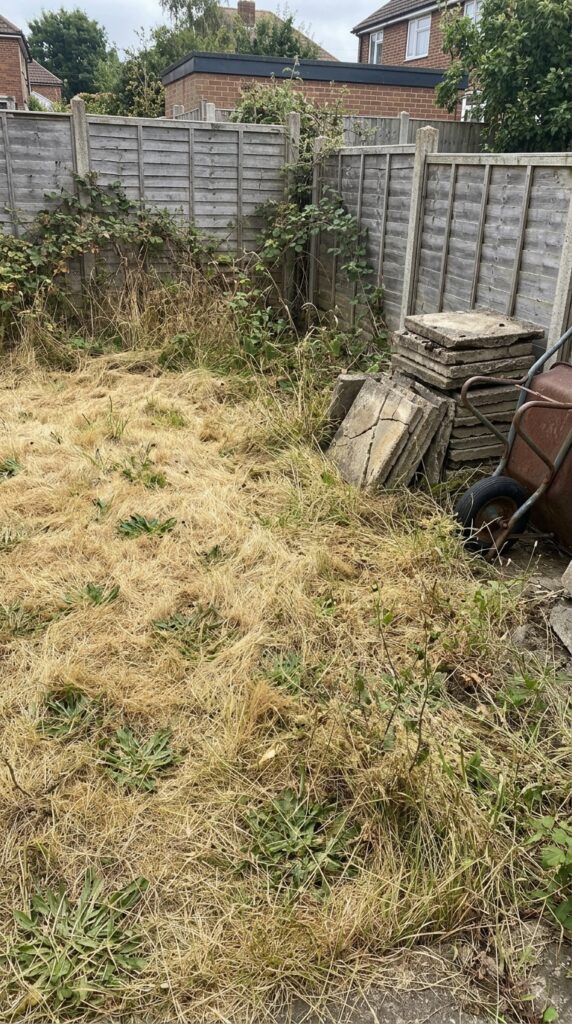
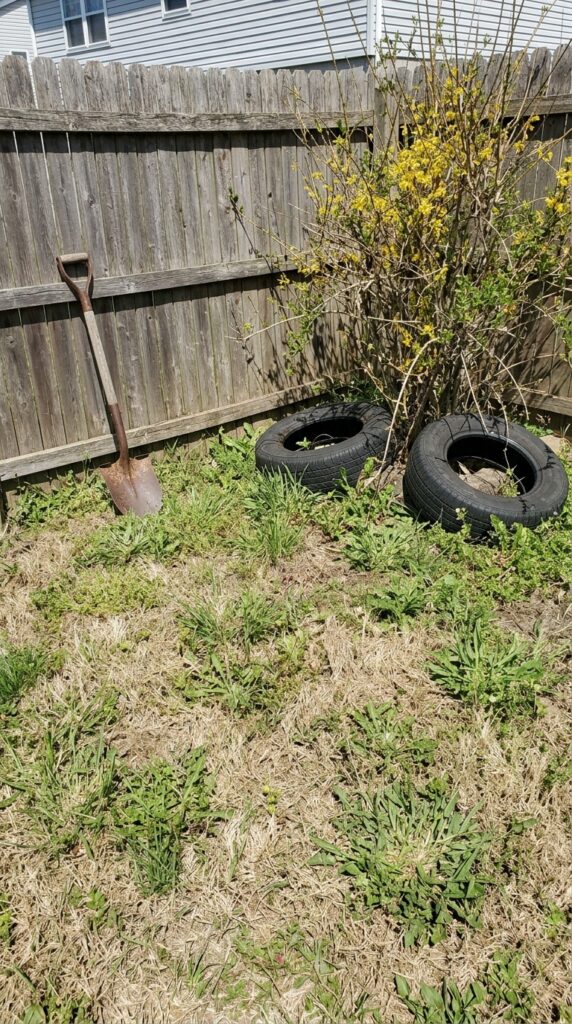
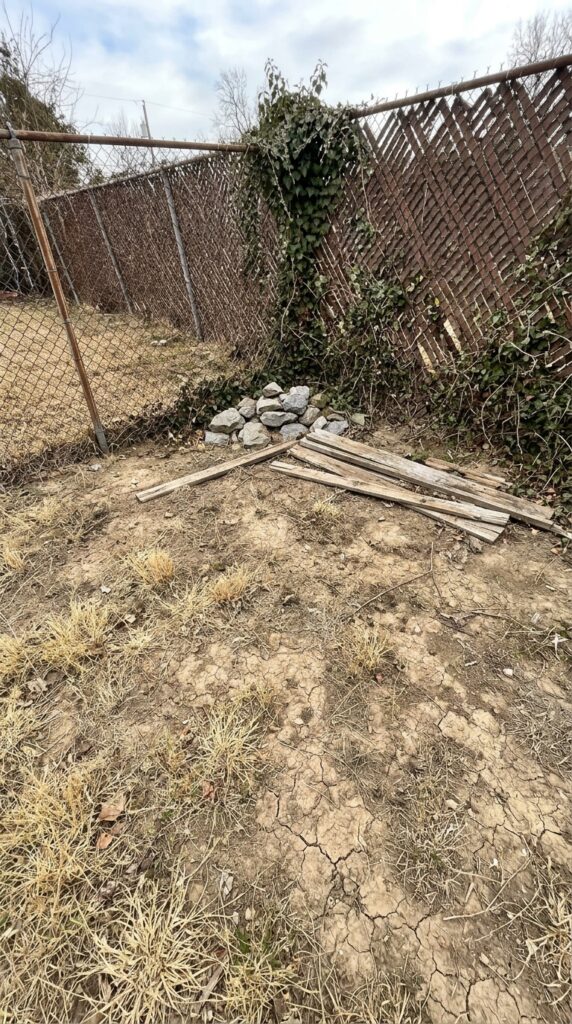
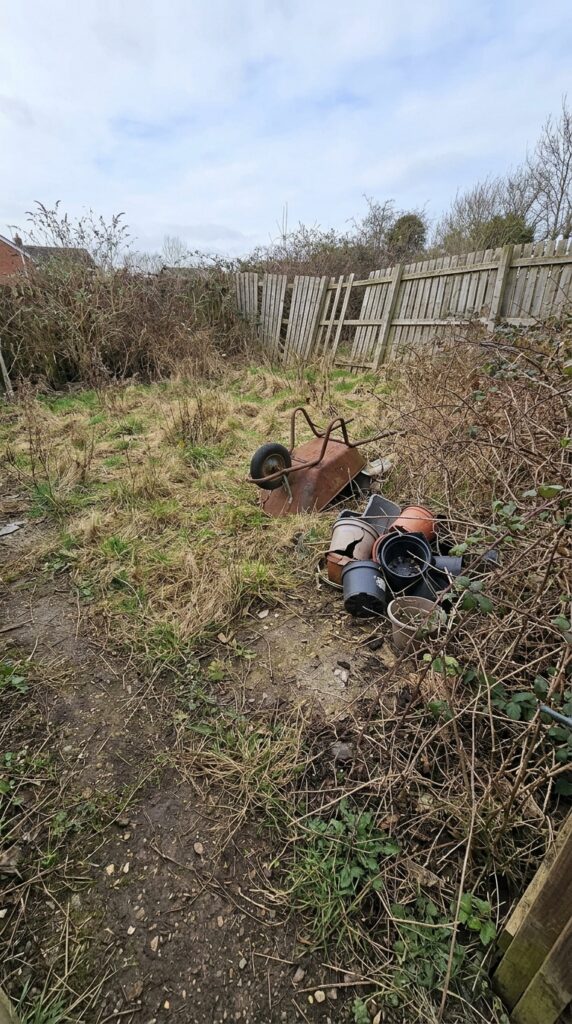
Before the makeover, the space looked like this:
- Dry, patchy soil
- Random weeds everywhere
- No defined layout
- Old plastic pots (some broken)
- Zero personality
It wasn’t just unattractive—it was unusable. You wouldn’t want to sit there, let alone invite anyone over.
And that’s where the challenge began:
👉 Transform this space for less than $100.
The Budget Breakdown (Real Numbers)
Here’s exactly how the money was spent:
- Seeds & small plants: $25
- Soil & compost: $15
- DIY planters (mostly free, a few supplies): $10
- Mulch (or wood chips): $15
- Solar lights: $15
- Decor (thrifted or DIY): $10
Total:
👉 $90
That leaves a small buffer—but the key is sticking to the plan.
Step 1: Clean-Up (The Most Important Free Upgrade)
Before spending a single dollar, the entire yard was cleared.
What Was Done
- Pulled out weeds
- Removed trash and broken pots
- Trimmed overgrown edges
- Raked and leveled the soil
Why This Matters
Cleaning alone can make your yard look twice as good instantly.
Pro Tip:
Don’t skip this step—it sets the foundation for everything else.
Step 2: Define a Simple Layout
You don’t need a professional design—just a basic plan.
The Goal
Create three small zones:
- Planting area (flowers or greenery)
- Pathway or visual flow
- Mini seating or focal point area
Even in a tiny space, structure makes a huge difference.
Step 3: DIY Planters (Save Big Money Here)
Instead of buying expensive pots, this makeover used creative alternatives.
DIY Planter Ideas
- Old buckets or containers
- Tin cans (painted)
- Wooden crates
- Plastic bottles (cut and hung)
Cost
👉 Almost free
Result
A cohesive, creative look that feels intentional—not cheap.
Step 4: Choosing Budget-Friendly Plants
Plants don’t have to be expensive to look amazing.
What Was Used
- Flower seeds (cheapest option)
- Small starter plants
- Fast-growing greenery
Best Budget Plants
- Marigolds
- Petunias
- Sunflowers
- Herbs (mint, basil)
Why This Works
- Seeds cost less but grow quickly
- Small plants are cheaper than mature ones
- Mixing both gives instant + future results
Step 5: Soil & Compost (Don’t Skip This)
Healthy soil = healthy plants.
What Was Added
- Basic garden soil
- Compost for nutrients
Budget Tip
Buy in small bags or look for local/free compost options.
Step 6: Mulch Magic (Instant Upgrade)
Mulch is one of the cheapest ways to make your garden look professionally done.
Benefits
- Keeps moisture in
- Reduces weeds
- Makes everything look clean and finished
Cost
👉 Around $10–$15
Spread it around plants and pathways—it instantly elevates the space.
Step 7: Create a Simple Pathway
A pathway adds structure and charm.
Budget Ideas
- Stepping stones
- Broken concrete pieces
- Gravel or wood chips
Even a small path makes your yard feel designed, not random.

Step 8: Add Lighting (Game Changer)
Lighting transforms your garden at night.
What Was Used
- Solar-powered stake lights
- Small string lights (optional)
Cost
👉 Around $10–$15
Impact
At night, the yard went from invisible to cozy and inviting.
Step 9: A Small Focal Point
Every garden needs something that draws attention.
Budget-Friendly Options
- A painted chair or bench
- A cluster of colorful pots
- A small DIY water feature
In this makeover, a simple seating spot with plants around it became the highlight.
Step 10: Finishing Touches That Cost Almost Nothing
This is where personality comes in.
Ideas Used
- Painted pots for color
- DIY garden signs
- Rearranged existing items
Result
A space that feels unique and personal—not generic.
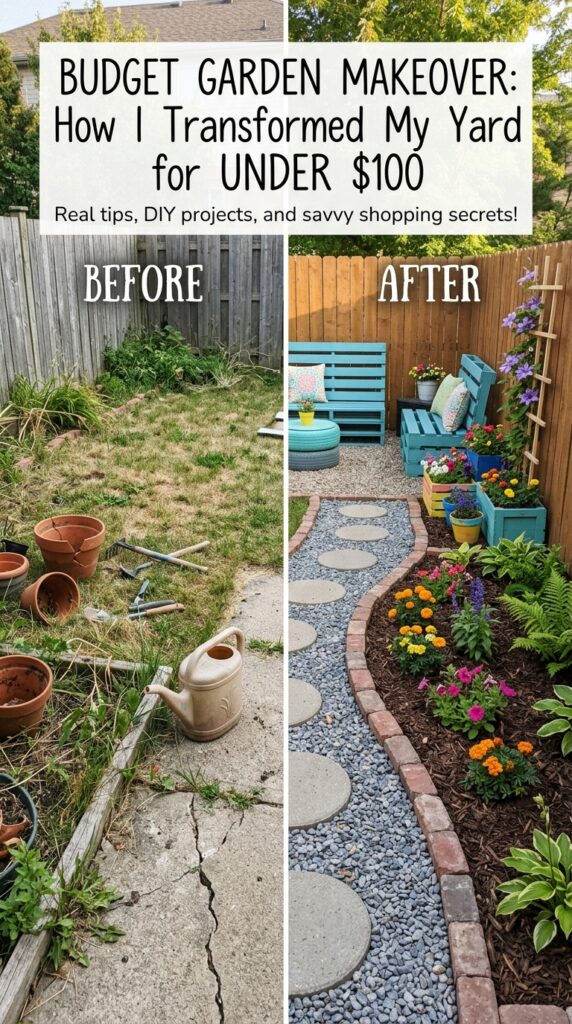
The Before & After: A Complete Transformation
Before
- Messy and unused
- No structure
- No color or life
After
- Organized and inviting
- Full of greenery
- Cozy and visually appealing
- Usable for relaxing
It didn’t just look better—it felt like a completely different space.
Why This $100 Garden Makeover Works
This transformation wasn’t about spending—it was about strategy.
Key Principles
- Use what you already have
- Focus on high-impact changes
- Keep it simple
- Think creatively, not expensively
Mistakes to Avoid (Even on a Budget)
1. Buying Too Many Plants at Once
Start small and let them grow.
2. Ignoring Layout
Even a cheap garden needs structure.
3. Skipping Soil Quality
Bad soil = wasted money on plants.
4. Overdecorating
Keep it clean and simple.
How You Can Do This in a Weekend
Here’s a realistic 2-day plan:
Day 1:
- Clean and clear the yard
- Plan layout
- Prepare soil
Day 2:
- Plant seeds and plants
- Add mulch
- Set up lighting and decor
Who This Is Perfect For
This type of makeover is ideal if you:
- Are on a tight budget
- Rent your home
- Have a small backyard or garden
- Want quick, visible results
The Bigger Impact: More Than Just a Garden
This isn’t just about plants.
It’s about:
- Creating a peaceful space
- Spending more time outdoors
- Improving your mood
- Making your home feel complete
And you did it all without breaking the bank.
Final Thoughts: You Don’t Need Money—You Need Creativity
A beautiful garden isn’t about how much you spend—it’s about how you use what you have.
This $100 makeover proves that with a little effort and smart planning, you can turn even the most neglected yard into something you’re proud of.
So instead of waiting for a bigger budget…
👉 Start with what you have—and build from there.